

The MC-10 was an attempt on the part of the Tandy Corporation (you know, the Radio Shack people) to compete with the success that was had by some other vendors who were cranking out cheaper and smaller computers like the (much more popular) Timex Sinclair. It was truly a worthless piece of shit. It shipped with 4K of RAM (16K was available as an expensive add-on accessory). It lacked a cartridge slot. So never mind playing "Dungeons of Daggerath" or plugging in a modem pack ... or a disk drive ... you get the idea. But in the late 80's and early 90's I was a kid attending an otherwise completely adult "Color Computer Club" where you could pop in monthly and hang out with some of the nerdiest and most socially awkward people you have ever had the displeasure of knowing. One of them owned one of these, and I envied it greatly.

When I found one in the box, with the power pack, booklet, and TV/Game switch, I had to buy it. And the price was right. Good Will charged me only $5.99 for what had previously sold for $119.95. So I bought it. Threw it into a pile in my basement, and forgot about it. Until now! I knew that once I got started, this poor thing would never be the same. Before I took a screwdriver to it, I hooked it up to a TV and showed my kids how a real man writes BASIC.
10 PRINT "DAD IS AWESOME";
20 GOTO 10
RUN
The kids were unimpressed. My son had the nerve to ask what else it could do. Kids these days. At that point, I split the case (voiding the warranty, I know). And here is what I found.

This thing was incredibly roomy inside. Or at least it would be with the circuit board removed. I laid my Raspberry Pi on the table to size things up. Looked possible. Next, I took a long look at the keyboard. Yeah, that's right, I wanted the keyboard to ACTUALLY WORK with my Pi.
I knew that this would be the toughest part of the job since I would be trying to recreate the functionality of a keyboard controller using GPIO pins on the Pi ... or something. I was hoping that the keyboard would be nothing more than a matrix keypad (regular old buttons in a columns and rows layout). The backing to the keyboard was a thick cardboard padding that could be removed with a couple of screws. I pulled it apart to expose the circuit traces.

Looked like a damned mess! I did some Googling and found that someone else had done a TRS-80 Model 100 Raspberry Pi conversion not too long ago. He had used a Teensy USB development board to turn a Matrix keypad into a USB keyboard. And it didn't look all that difficult. So I ordered a Teensy 2.0 (not the ++ model, just the regular $19 version).
While waiting for that to arrive, I pressed on. I had couple obstacles to tackle if I wanted this thing to actually be a USEFUL device. Namely, I needed to power this device - while providing additional USB ports. Oddly enough it looked like I could get away with powering the Pi from a USB hub ... while at the same time linking the Pi to the hub to provide additional ports. Here is what that scene looked like on my desk.

You will also see from that above picture that I was experimenting with how I would "map my ports" from the Pi to the MC-10 case. I have no intention of soldering to or otherwise bringing harm to my Pi. So any modifications would have to be done to my franken-MC-10. I started with extending the network by making a very short male to female cable and then glued the female end into the case. To give it some 'stature' I glued a small wooden block underneath of it. That also raised it to the correct height.
Once I knew that would work I got right to work at stripping away the plastic from the USB hub and giving it a home in the MC-10. It fit surprisingly well! Naturally there was nowhere for the ports to poke out of the back of the MC-10 so there was some Dremel work that had to be done. I suck at using rotary tools, so please excuse the crude cut-around work in these pictures. Also, the fun was cut short when my boss came back to my desk and said "what are you doing?? stop it!! that's loud ... and annoying!!".

I didn't want a bunch of cables running inside and outside of the case, which meant that I would have to make some modifications to the USB hub itself. Not a big deal really. I cut up an old USB A/B cable, and a micro-USB cable. I removed one of the USB ports from the hub with a desoldering wick and then hard-wired a micro-USB stump into it's place. This would power my Pi. I also soldered down a standard USB connector to make the bridge between the "B" port of the hub to the Pi. This actually makes the hub light up and become an additional three ports (originally four, but you know, one of those was pulled).

Being the master hardware modifier that I am (not) you can see that I used stacks of double-sided foam tape to lift the USB hub to the right height and to hold it down into my case. Here it is nicely mounted and connected into the case. Note that I later came along with hot glue and glued down some spots around the sides of the hub where you would be applying pressure when inserting a jump drive or something.

Another nice feature of using the USB hub is that it had a "self / bus" switch. This means you can use it like a powered hub with a power cable, or a non-powered without the cable. For my purposes it works like an on/off switch for my Pi! Neat! I could extend that switch to the side of the case? Nah.
A few days layer my Teensy USB arrived in the mail. The shipping was fast! I went right to work trying to get the keyboard working. And then spent the next couple of ... days ... figuring out what the hell I was doing. Step #1 was to connect the Teensy to a breadboard. The thick clear ribbon cable could then be aligned to pins really easily by just pushing them into the breadboard.

And then using the sample "Keypad.h" code that is readily available, I was able to start making keys do something!! But what was a column - and what was a row? I took a guess. Got it wrong. No problem, just reverse the pins I was using for each. But not all pins seemed to actually work. And after hours of non-progress I started researching.
Unfortunately the MC-10 was never liked enough to be repaired. I imagine if it ever 'went bad' you simply threw it away instead of sending it off for an overpriced repair. Hell, I sent off a Color Computer 3 once for repair. It took two weeks and $80 to make it run again. At a cost of $119.95 for a new one ... well you get the idea. Being that there was no repair manual, I didn't have any technical reference guides to refer to.
I couldn't imagine that the keyboard for the MC-10 would be mapped like a standard Color Computer 2 or 3. This was a completely different sized keyboard, with LESS keys on it. But ... perhaps it would give me a start? So I tracked down a TRS-80 Technical Reference Manual on archive.org and drilled down to the keyboard schematic.
Would you believe that the key layout is nearly identical?

Over the next few days I used the Arduino development software - paired with the Teensy loader to write out a USB Keyboard routine using the above schematic as a rough reference for what letters and numbers fell into which columns and rows. The amazing thing about the layout is that it would have been FAR easier to create a schematic where "QWERTY" started off the first row, instead of "ABCDE". In other words, it's an alphabetical matrix ... with a wild run of paths around a printed circuit board to make it all work. Pretty neat.
I am sharing my code via PasteBin: http://pastebin.com/79gSmXy0
And for fun, here is a crappy screenshot from when I was demonstrating an early version of my code.

This is by no means a USEFUL keyboard. Still, I was impressed at how well it functions. I had a hard time getting multiple key presses to work (lot's of forum posts on this topic) ... and defining modifier keys was awkward. I have found some other efforts out on the web which handled this far more gracefully than I did.
Example: To make a capital letter, you would press the shift key once, and then press the letter. It works like a toggle key of sorts. But you also probably want a tab key. And a backspace key. And you know ... normal stuff like that. So hey, the keyboard is a work in progress. If I were to sit down and use this damned thing for more than 10 minutes ... I would probably plug in a REAL keyboard.
To finish things up ...
I removed the breadboard and did a hack soldering job to make the Teensy rig a little more permanent. Although I did use a IC socket to solder to so that I could have my Teensy back for another project if I ever wanted to yank it out.
I remapped the composite video port to the lid of the case (the MC-10 had defined it as 'TO TV' and this still holds true). And hey - I don't need that pesky TV/Game switch any more!
I installed a small internal speaker with an old audio cable, and what had been some cute little collectable character from Radio Shack that doubled as an external speaker. He was on clearance for around four bucks. I gave him a quick and painless death.
Some hot glue. A couple strips of Velcro. Oh, and an Airlink 101 ($11 from Amazon). Boom! It's complete!

Let me tell you, it's a tight squeeze, but this all fits back together very neatly, and without any of my parts rubbing together to cause me any trouble.
Now that I had my dream MC-10 ... what would I do with it?
I tried using the standard Debian Wheezy build from the Raspberry Pi site but I had some serious problems getting my Teensy keyboard to work correctly. And yet when running any other distribution ... I didn't have any problems. So I resorted to running the Arch distro for the Pi.
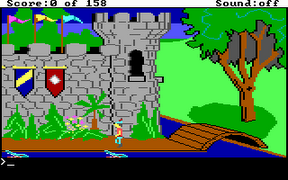
Once the OS was installed ... I added dosbox, and .... Kings Quest Part I. Ah, here is something that my MC-10 could never do! Run games for the Color Computer 3 with a 512k upgrade installed! And yes, these games are the reason that I remapped the awkwardly placed arrow keys on my MC-10 keyboard.
Now I just need my mom to come stand behind me and ask "is your homework all done?" and it will be just like the good old days.


